 Programming
Linking Your Azure Account with Octopus Deploy
In order to deploy your application to Azure using Octopus you need to link your Azure Account. In this post I'll show you the steps to link your Azure account with Octopus Deploy.
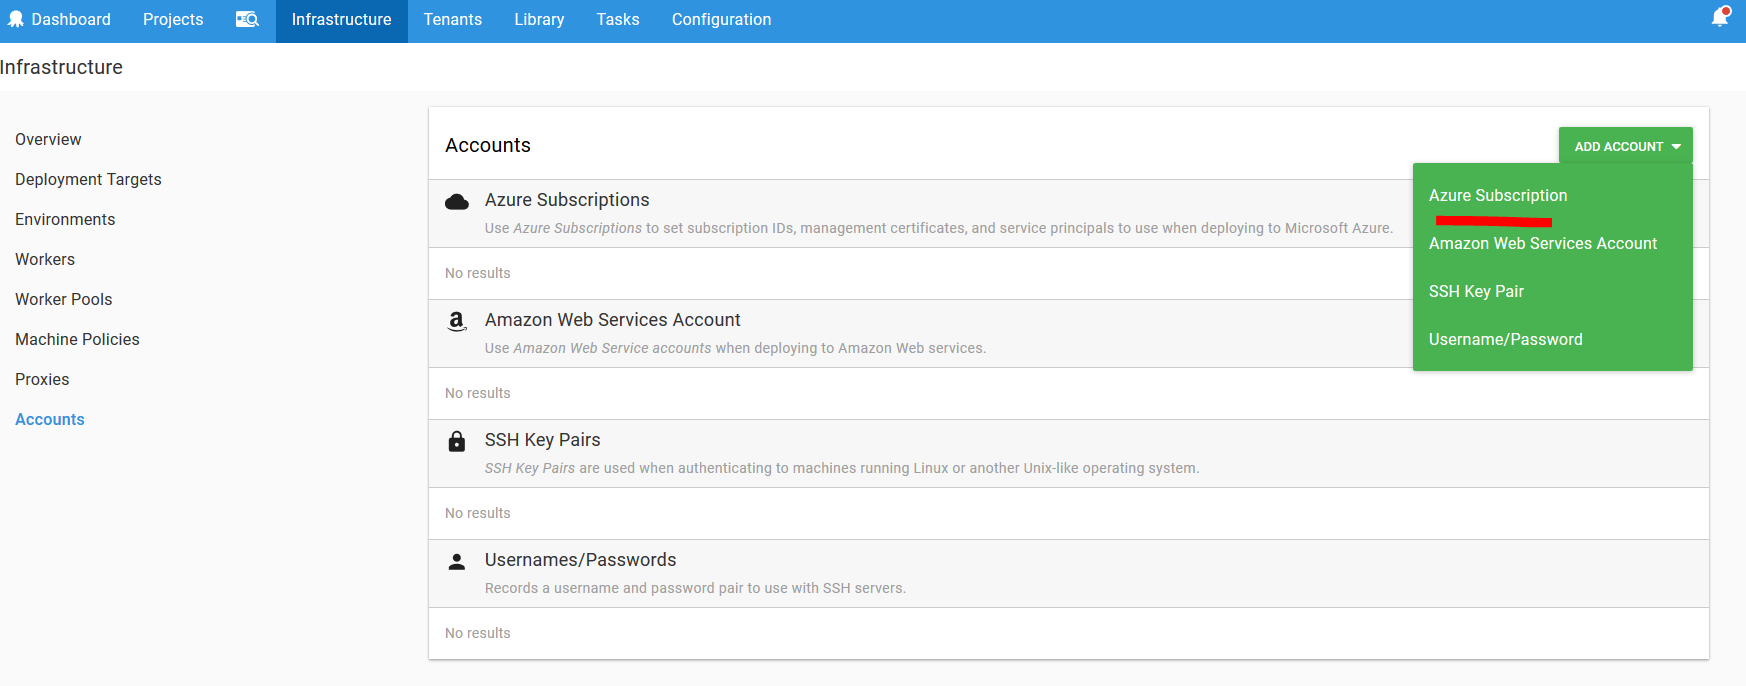
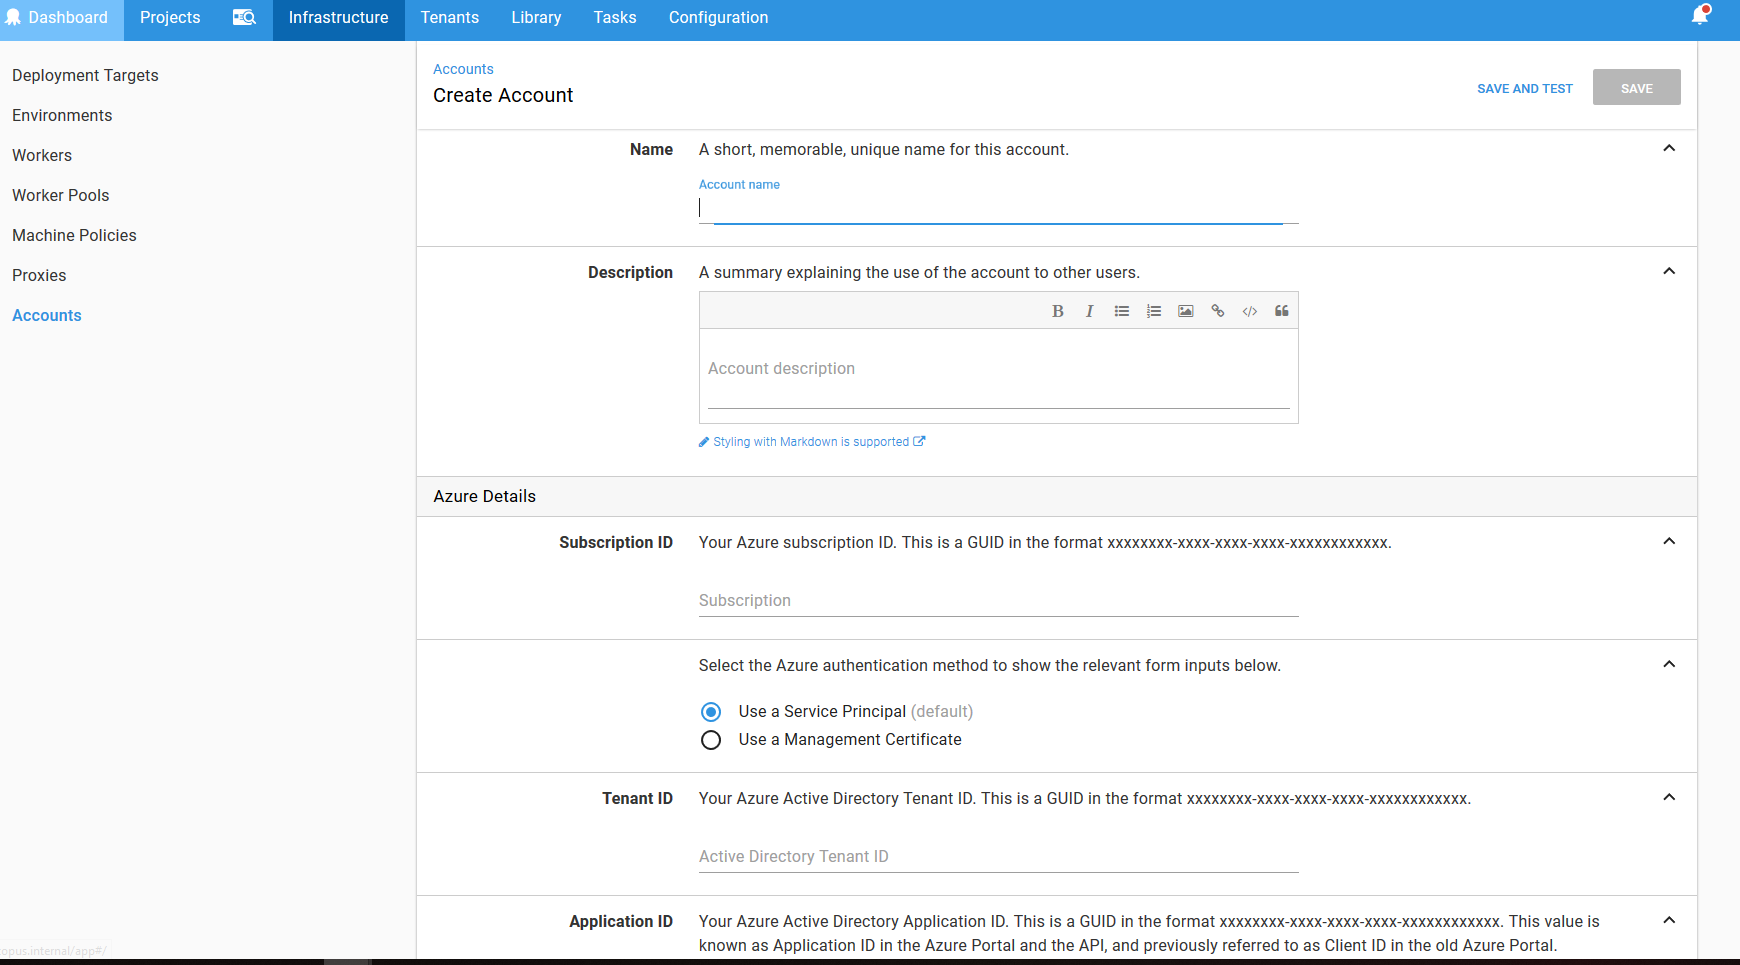
1. Go to Infrastructure > Account > Add Account (button) > Azure Subscription
- Fill in your Account Name and Description. I usually name it the same as my subscription name in Azure.
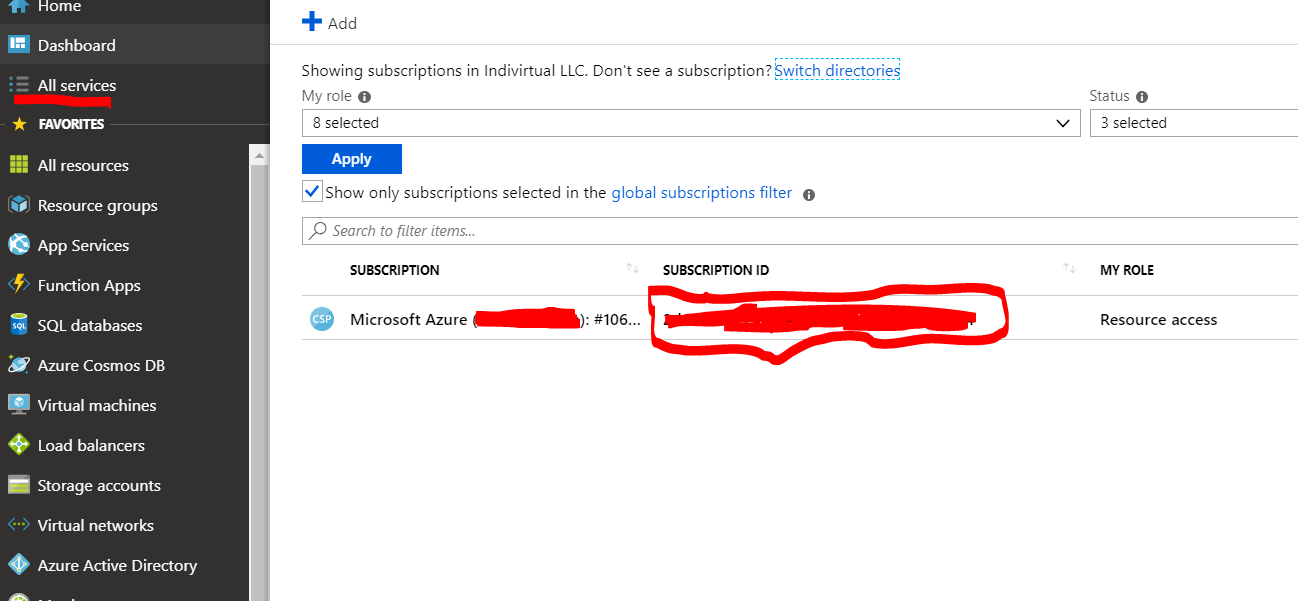
2. Getting your Subscription ID
- Go to All Services > Subscriptions
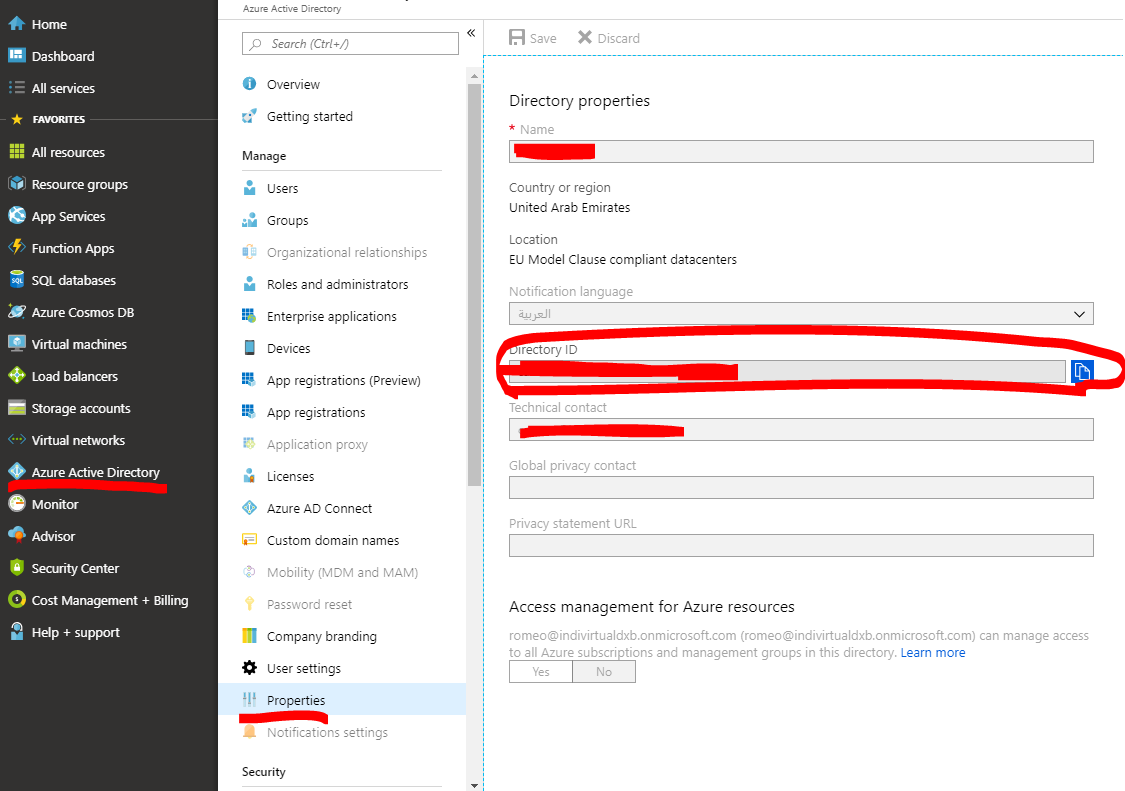
3. Getting your Tenant ID
In the Azure blades go to Azure Active Directory > Properties and you'll see a field there called Directory ID which contains a GUID. That's the Tenant ID you'll add in Octopus.
4. Getting your Application ID
Octopus Deploy needs an Application ID and a key to access Azure API. To get this you need to register a new application.
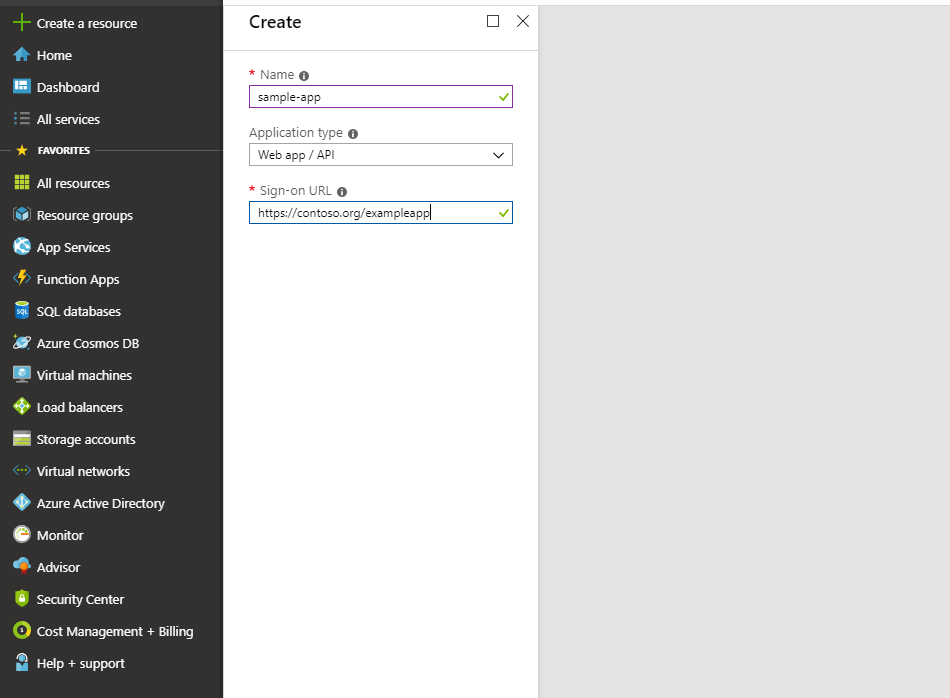
Go to Azure Active Directory > App Registrations > and click the New Application Registration
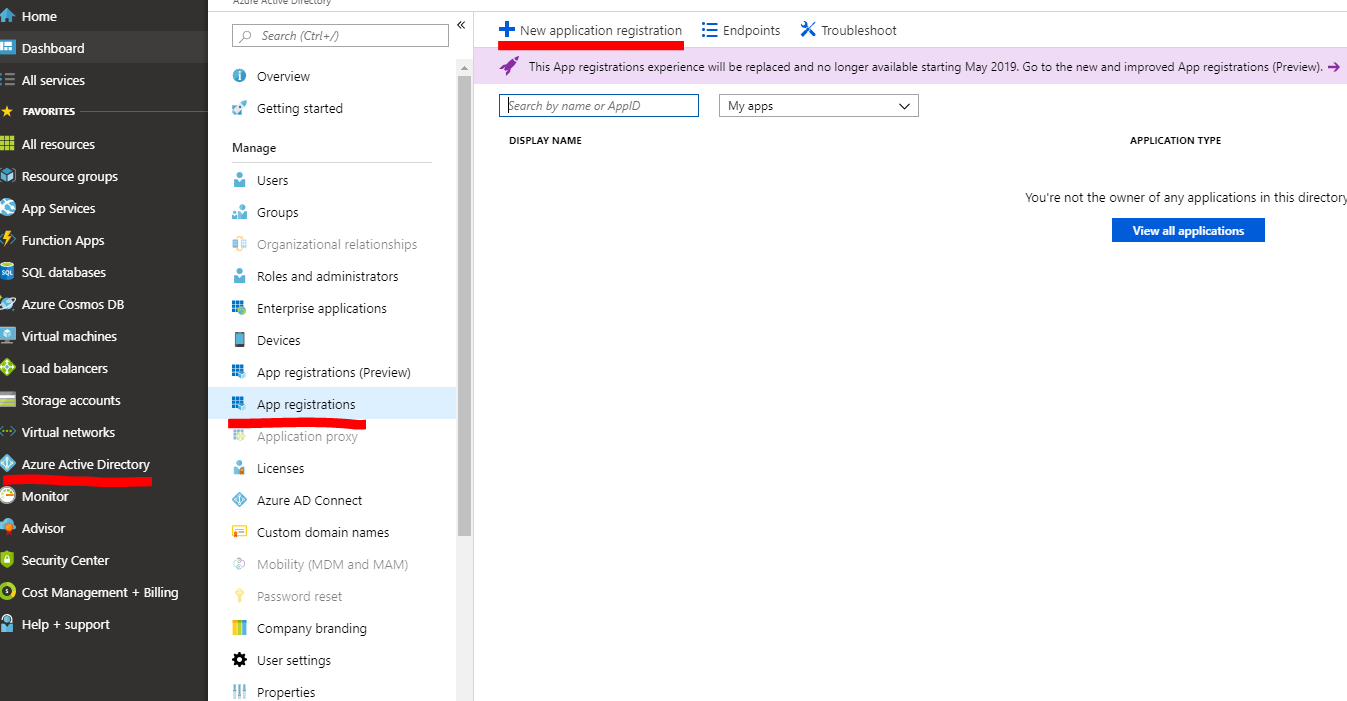
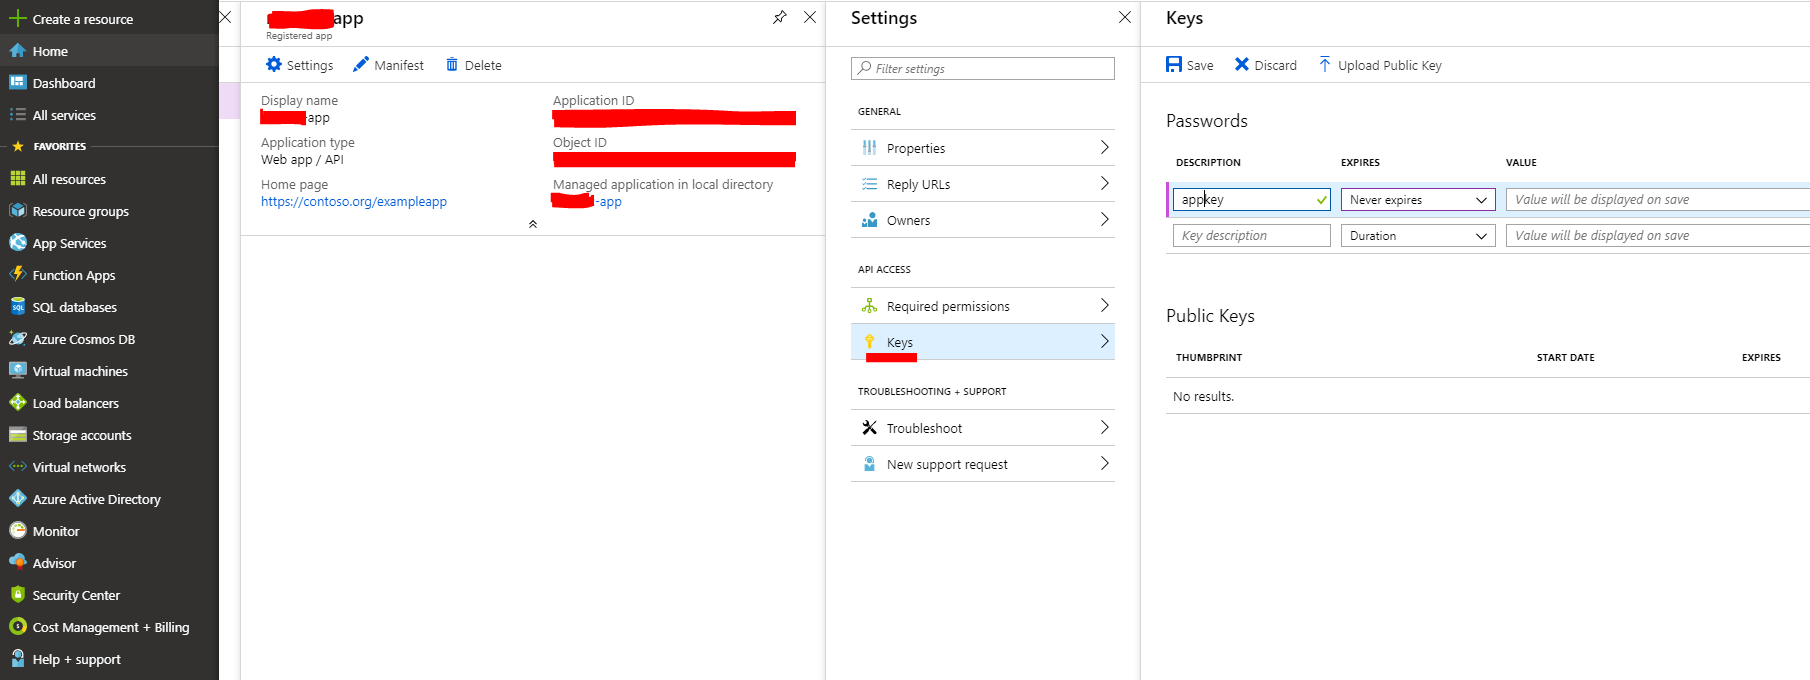
Go to your app Settings > Keys - add a app key name assign your desired duration and then save. Your key will now show in the value.
5. Add Azure details then save and test your account
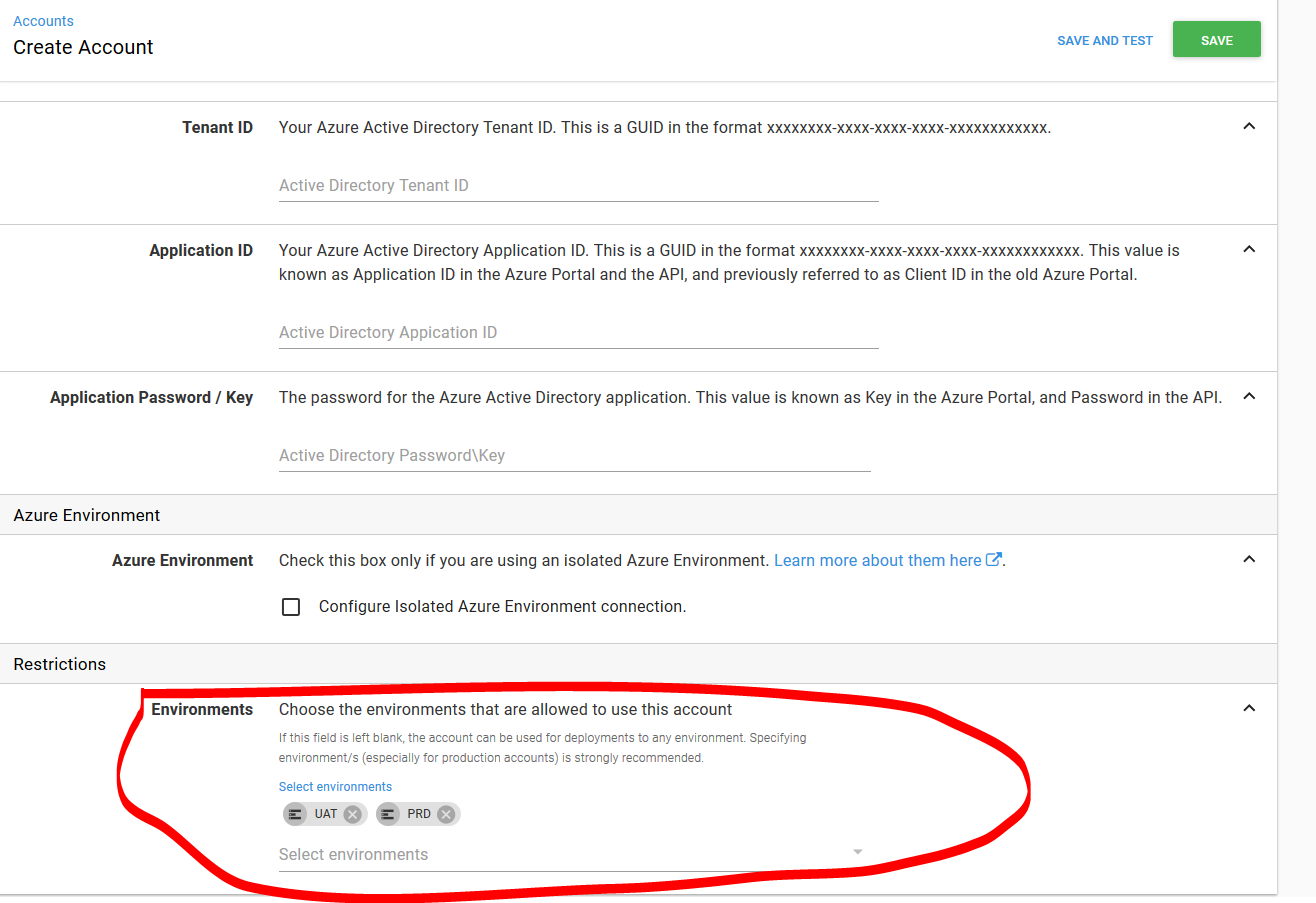
Add the details you gathered from the steps above, test the connection and save it.
You can also assign the environment which it will be used.
After setting up your Azure Account in Octopus Deploy your one step closer to deploying your application to Azure.
On my next post I'll show how to add this account to your deployment targets. (Find it on this link)
Reference:


